Want a long-lasting, flawless tan?
The secret isn’t just in the tan itself, it’s all in the prep work. And when we say prep, we mean doing it properly; the kind of prep that takes your tan from “meh” to jaw-dropping, long-lasting perfection.
Stick with us, because we’re about to show you exactly how to prep like a pro and get a smooth, even, long-lasting bronze every time.
Leading up to tanning
PRODUCTS: What you put on your skin (and hair!!) matter
When it comes to getting a flawless tan, the products you use every day can make or break it. That body wash you grab at the grocery store, your usual moisturiser, even hair products, they can all contain ingredients that dry out your skin or strip your tan before it even has a chance to develop.
Think SLS/SLES (Sodium Lauryl Sulfate), mineral oils, paraffinum liquidum, or isopropyl alcohol. These sneaky ingredients can cause your tan to fade faster or patch, no matter how good your application was.
Overhauling your daily products pre and post tanning is a game-changer. Swap in formulas that hydrate, protect, and support your skin so your tan lasts longer and looks smoother.
Here are some of my top picks to get you started:
Bella Bronze Moisturiser (Online Only) – SHOP HERE
Bella Bronze Body Wash (Online Only) - SHOP HERE
Natural Look Haircare Range - SHOP HERE
Use products that actually work with your tan, not against it, and watch your colour stay flawless for days.
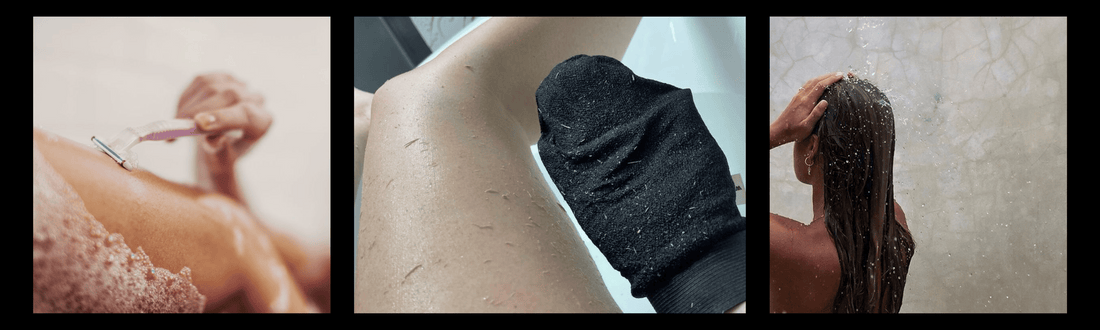
EXFOLIATE: Get Your Skin Ready to Glow
At least 24 hours before you plan to tan, it’s time to go all-in on exfoliation. We’re talking every inch of your body; don’t skip a spot! Can’t reach your back? Ask a friend for help, or prop your exfoliating mitt on something long so you don’t miss those tricky areas.
A quick tip: skip scrubs with oils. Oils can leave a residue on your skin, which can interfere with how your tan develops and how long it lasts. You want your skin clean, smooth, and ready to absorb the tanning solution evenly.
So why the 24-hour wait? Exfoliating removes dead skin cells, which makes your skin more receptive to the tan. But your skin also needs a little time to settle, close pores, and regain its natural balance. Tanning immediately after exfoliating can sometimes irritate the skin or make your tan patchy, so waiting a full day ensures a flawless, long-lasting finish.
Exfoliation isn’t just prep, it’s also perfect for removing old tan. Make sure all remnants of previous tans are gone before your next application to avoid patchiness and uneven colour. For an extra-smooth base, try our Uncaged Tan Remover to easily lift stubborn tan and get your skin ready for a flawless fresh layer.
Think of this step as the foundation for your perfect tan. Smooth, prepped skin = next-level bronze.
HAIR REMOVAL: Timing Is Everything
If you’re all about embracing your natural self, feel free to skip this step — no judgment here.
Shaving: Do it 24 hours before your tan. This gives your pores enough time to close so your tan doesn’t settle in them and create the dreaded “strawberry seed” effect (not a vibe, trust me). Make sure to shave after exfoliating for a cleaner, closer shave.
Waxing: Aim for 48 hours before tanning. This allows pores to close, prevents the tan from clinging to freshly opened follicles, and gives your skin enough time for the top layer of cells to grow back — the perfect surface for your tan to grab onto and develop evenly.
Proper timing with hair removal ensures your tan stays smooth, even, and free from those little unwanted patchy spots, giving your skin the perfect canvas for that bronzed, even colour.
HYDRATE: Your Skin (and Tan) Will Thank You
The more hydrated you are, the happier your skin — and your tan — will be. Drinking your daily recommended water is always a must, but it’s especially important in the days leading up to your tan. Well-hydrated skin holds onto colour better, fades more evenly, and feels softer to the touch.
Think of hydration as giving your skin a little extra love before the magic happens. Your tan isn’t just sitting on the surface, it’s bonding with your skin, and the better your skin feels, the better your tan looks and lasts.
OTHER BEAUTY TREATMENTS: Tan Comes Last
Your fake tan should always be the last step in your beauty routine. Anything that involves chemicals — facials, peels, nails, waxing, or even hair colouring, can affect how your tan develops if done afterward.
Leaving your tan until the end gives it time to marinate properly, develop evenly, and avoids fading or transferring while you’re still prepping or moving between appointments. It’s simple: do everything else first, then finish with your tan, so all your hard work pays off and your glow looks flawless from start to finish.
The day of tanning
REMOVE PRODUCTS FROM SKIN: Clean Slate for a Flawless Tan
Been working, hitting the gym, or running errands? Sweat, deodorant, moisturiser, perfume, all of it can interfere with how your tan develops. Even tiny residues can cause patchiness or weird colour changes (A sure way to turn green FYI)
Here’s how to prep like a pro:
- Take a quick lukewarm or cold shower at least an hour before your tan. No scrubbing, no soap — just rinse off sweat and any leftover products.
- Finish with a blast of cold water to help close your pores, leaving your skin smooth and ready for an even tan.
- Pat dry gently with a clean towel — avoid rubbing, which can irritate freshly prepped skin.
This simple step wipes the slate clean and ensures your tan can develop perfectly, giving you a flawless, long-lasting bronze.
TACKLING DRY AREAS: Even, Flawless Colour
Some spots are naturally drier than others; we’re talking knuckles, elbows, knees, and ankles. If left untreated, these areas can absorb more tan and end up darker or even slightly orange.
The fix? Use a tan-safe moisturiser, like the Bella Bronze Moisturiser, and apply a tiny amount to these dry patches before you tan. Just a light layer is enough to create a barrier so the tan develops evenly across your whole body. Not every person will need this step. Essentially, the dryer your skin is overall the higher likelihood this step is necessary for you.
Quick tips:
- Don’t overdo it; too much moisturiser can prevent the tan from sticking.
- Make sure your skin is fully dry before applying the tan.
- These little prep steps make a huge difference to the overall finish and longevity of your tan.
This step takes your tan from "she faked it" to "is that her natural tan?"
REMOVE JEWELLERY: Let Your Tan Shine
Before you get tanning, take a moment to remove all rings, bracelets, watches, and necklaces. Metal and jewellery can create uneven marks or block the tan, leaving unwanted lines on your skin.
Even small pieces like hair clips or earrings near the neck can affect how the tan develops in those areas, so it’s worth going over yourself carefully.
Pro tip: If you’re wearing long sleeves or pants, roll them up or loosen them while the tan develops to avoid any creases where the fabric or jewellery might press.
SPRAY TANNING ATTIRE: Dress for Tan Success
Dark, loose-fitting clothing is your best friend after a tan. Why? Tight clothes can rub on your fresh tan, acting like exfoliation and taking colour with them, which is the opposite of the flawless glow you’re going for.
And ladies, ditch the bra if you can (let those girls roam free lol) to minimise tan marks on your chest.
If the weather’s less than ideal when you're off to run errands; rain, wind, or puddles, opt for long, dark, loose clothing, grab an umbrella, and park as close to the entrance as possible to avoid unnecessary friction or smudging.
Outfit inspo: Trackpants, hoodies, loose skirts or dresses, oversized T-shirts, pyjamas, or a cosy dressing gown. No satin, velvet, silky materials, cotton or bamboo materials are best. The key is comfort, darkness, and room to let your tan breathe while it develops.
Pro tip: Avoid new or stiff fabrics that might crease or rub off colour, and stick to things you don’t mind getting a little tan on, because some transfer is inevitable during the first few hours.
And just like that, you’re fully prepped and ready to achieve your flawless, long-lasting tan! Follow these steps, take your time with each stage, and your skin will thank you — trust me, all that prep makes a massive difference.
Pair this routine with our full range of Uncaged self-tanners for the most comfortable, streak-free, and beautifully bronzed results. From first swipe to fully developed colour, your tan will look even, natural, and utterly next-level.
Happy tanning! 🖤